How to Turn On Network Discovery in Windows 11
Network discovery is the way Windows computers find each other on a network. To locate other computers on a Network (or vice versa), we need to enable Network discovery and file sharing.
To turn on Network discovery on Windows 11, we will complete the following steps:
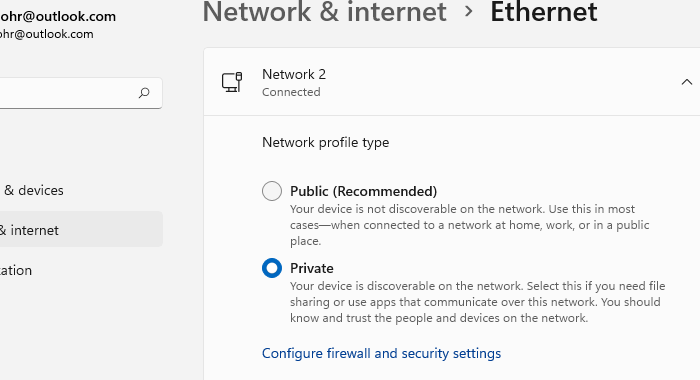
- Change Network Profile to Private.
- Turn on Network discovery in the Network and Sharing Center.
To change network profile type, open Windows Settings (press Windows Logo Key + I) and click Network & Internet.
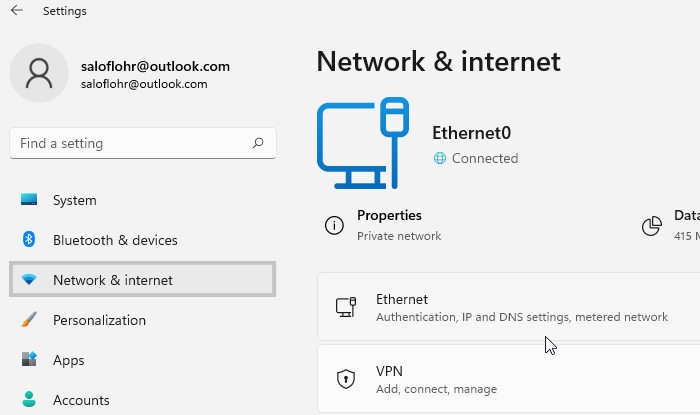
Then, click on the Ethernet (or Wi-Fi for wireless connection) and switch to the Private network profile, as shown in the following screenshot.
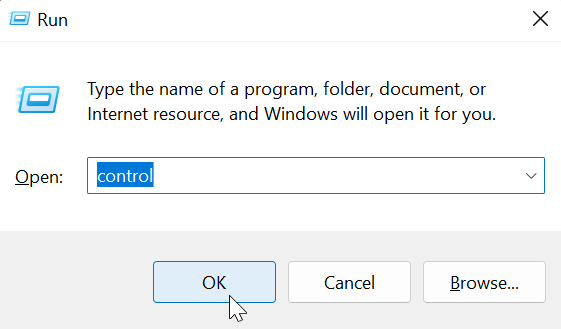
Next, open the control panel: open the Run dialog box (press Windows Logo Key + R), type control, and press Enter.
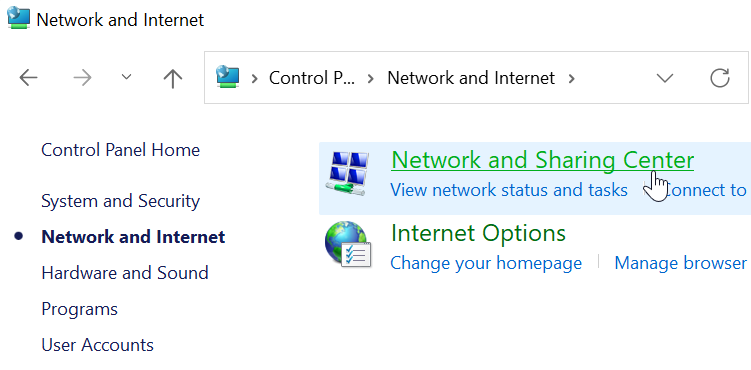
Choose Network and Internet from the Control Panel, then Network and Sharing Center on the next screen.
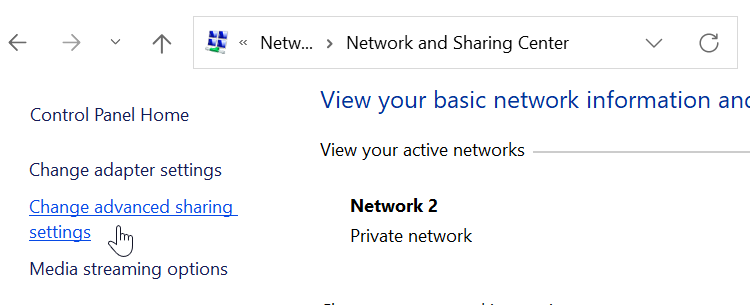
When the Network and Sharing Center window opens, click Change advanced sharing settings from the left navigation menu.
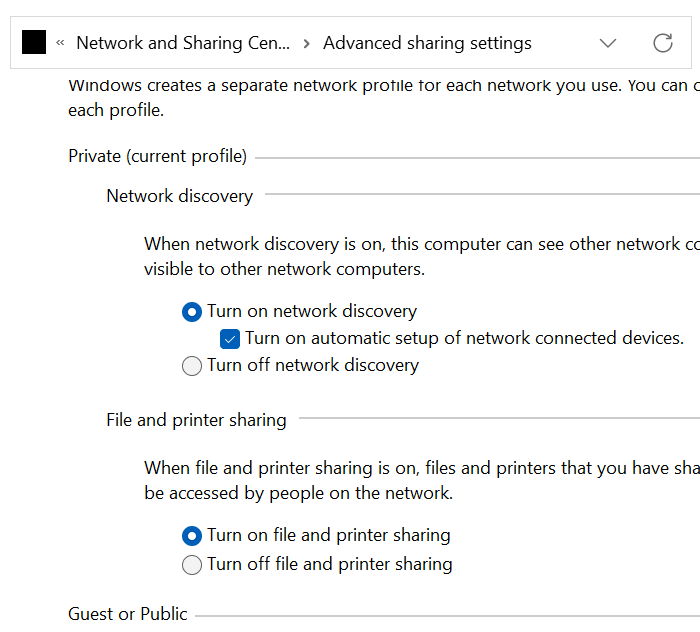
Under the current profile, switch to Turn on network discovery and Turn on file and printer sharing radio buttons, as shown in the following screenshot, and then click Save Changes.
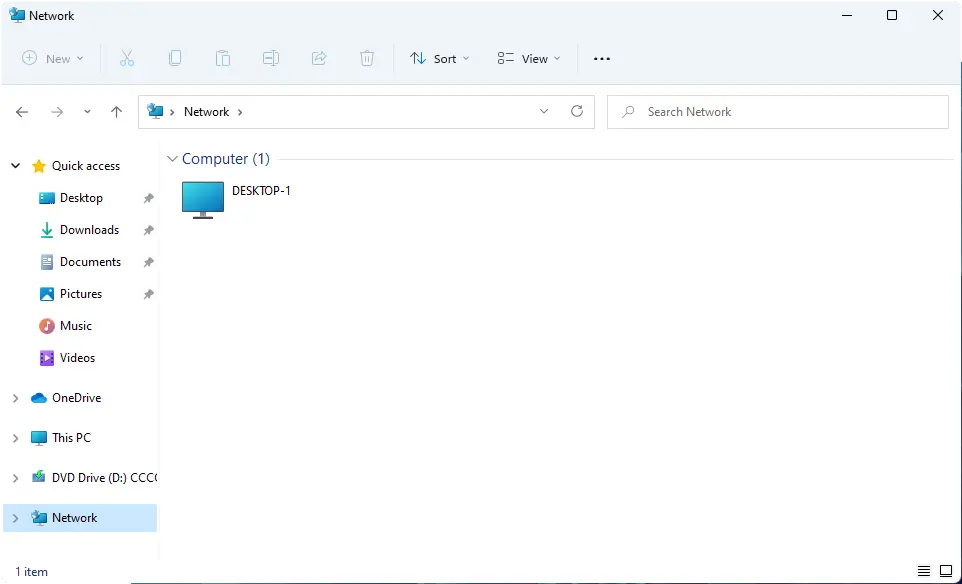
And we are done! You can locate shared computers in the network pane of Windows Explorer.
Sharing a Folder
Here's how to share a folder on Windows 11:
- Right-click the folder you want to share and choose Properties from the context menu.
- Go to the Sharing tab and click the Advanced Sharing button.
- Activate the Share this folder checkbox and click OK.
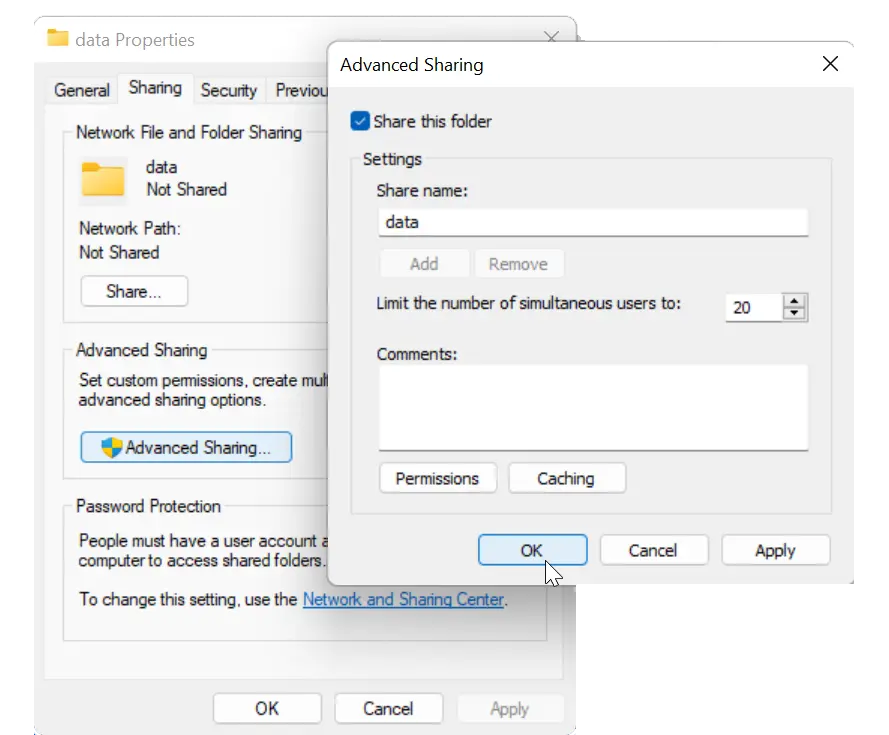
In the Advanced sharing window, click the Permissions button if you want to modify share permissions.
That brings us to the end of this guide. One can also follow the above steps on Windows 10 to Turn on Network Discovery and File Sharing.